The difference between virtual and and console session types
NICE DCV offer two types of sessions: console and virtual. Lets check all differences:
- OS support:
- Console: Linux and Windows NICE DCV servers
- Virtual: Just Linux
- Multiple sessions:
- Console: Just one
- Virtual: Multiple consoles
- Permissions:
- Console: Just privileged user (admin) can start and close
- Virtual: Any user can start and close
- Direct screen capture:
- Console: Yes
- Virtual: No
- GPU-accelerated OpenGL support:
- Console: Yes, without any extra package
- Virtual: Yes, but requires the DCV-GL package
Important notes:
- You can not run virtual and console types in the same NICE DCV server.
- Virtual consoles will run each one in a dedicated Xdcv display, but there are other resources that will share same configuration files, like: User’s home folder, D-Bus services, and devices connected in that user. So is expected that you run one virtual console per user, or you can get problems.
Dynamic Console Sessions
Overview
The standard approach for NICE DCV console sessions is to have a session created statically for a specific user. In some cases it is preferred to enable users to connect to NICE DCV and dynamically be able to use the DCV Console Session.
To implement this we automatically create a console sessions for a specific standard user and set the maximal number of connection to the DCV console session to 1 so no other user can connect and allow all users to connect to the session in the permissions file.
Below are the steps to enable Dynamic DCV Sessions on Windows and Linux NICE DCV Servers.
Linux
In /etc/dcv/dcv.conf we apply the following settings:
# In /etc/dcv/dcv.conf in the session management section we apply the following settings

[session-management]
# Specify the maximum number of concurrent clients per session. Limit to 1 in this case.
max-concurrent-clients = 1

# Property "create-session" requests to automatically create a console session
# (with ID "console") at DCV startup.
create-session = true

[session-management/automatic-console-session]

# Property "owner" specifies the username of the owner of the automatically
# created "console" session. You can set this to a standard service user.
owner = "centos"
# owner = "ubuntu"

[connectivity]
# Property "idle-timeout" specifies a timeout in minutes after which
# a client that does not send keyboard or mouse events is considered idle
# and hence disconnected. Default is 60 minutes.

# You can adapt this setting to your needs to free the console session e.g. after 30 minutes.
# idle-timeout=30

# Number of seconds to warn via notification before idle-timeout
# idle-timeout-warning=300

# Whether the clients are disconnected on OS session lock
# Enable this to force client disconnection when the remote OS session is locked.
# You can set the OS auto lock to be shorter than the idle-timeout so that connections
# are closed automatically (idle time default is 60 minutes)
disconnect-on-lock=true

# The following setting should be enabled by default which controls whether to
# lock the OS session when the last client connection ends
# [security]
# os-auto-lock = true
You can check more details here: https://docs.aws.amazon.com/dcv/latest/adminguide/config-param-ref.html#session_management
In /etc/dcv/default.perm we allow all users to connect. More details can be found in https://docs.aws.amazon.com/dcv/latest/adminguide/security-authorization-file-create.html
; In /etc/dcv/default.perm in the permissions section we apply the following setting to allow all users
; Permissions can be adjusted for the respective purposes, builtin enables all permissions

[permissions]
%any% allow builtin
After one user has connected the following users will see a message similar to this:

Windows
Here are the settings to enable dynamic console session for NICE DCV on Windows configuring the NICE DCV Server.
# Set the maximum number of concurrent clients per session to 1
New-ItemProperty -Path "HKEY_USERS\S-1-5-18\Software\GSettings\com\nicesoftware\dcv\session-management" `
  -Name "max-concurrent-clients" -PropertyType DWord -Value 1 -Force

# Enable automatic creation of a console session at DCV startup
New-ItemProperty -Path "HKEY_USERS\S-1-5-18\Software\GSettings\com\nicesoftware\dcv\session-management" `
    -Name "create-session" -PropertyType DWord -Value 1 -Force

# Set the owner of the automatically created "console" session, e.g. Administrator
New-ItemProperty -Path "HKEY_USERS\S-1-5-18\Software\GSettings\com\nicesoftware\dcv\session-management\automatic-console-session" `
    -Name "owner" -PropertyType String -Value "Administrator" -Force

# Set the idle timeout (in minutes) after which a client is considered idle and disconnected
# New-ItemProperty -Path "HKEY_USERS\S-1-5-18\Software\GSettings\com\nicesoftware\dcv\connectivity" `
    -Name "idle-timeout" -PropertyType DWord -Value 30 -Force

# Set the number of seconds to warn via notification before idle timeout, e.g. 5 minutes
# New-ItemProperty -Path "HKEY_USERS\S-1-5-18\Software\GSettings\com\nicesoftware\dcv\connectivity" `
    -Name "idle-timeout-warning" -PropertyType DWord -Value 300 -Force

# Enable client disconnection when the remote OS session is locked
New-ItemProperty -Path "HKEY_USERS\S-1-5-18\Software\GSettings\com\nicesoftware\dcv\connectivity" `
    -Name "disconnect-on-lock" -PropertyType DWord -Value 1 -Force

# Enable locking the OS session when the last client connection ends, default is enabled
# New-ItemProperty -Path "HKEY_USERS\S-1-5-18\Software\GSettings\com\nicesoftware\dcv\security" `
    -Name "os-auto-lock" -PropertyType DWord -Value 1 -Force
To allow all users to connect we specify in the default.perm file using Powershell with Admin rights:
$filePath = "C:\Program Files\NICE\DCV\Server\conf\default.perm"
$fileContent = @"
; In /etc/dcv/default.perm in the permissions section we apply the following setting to allow all users
; Permissions can be adjusted for the respective purposes, builtin enables all permissions

[permissions]
%any% allow builtin
"@

New-Item -ItemType File -Path $filePath -Force
Set-Content -Path $filePath -Value $fileContent
After one user has connected the following users will see a message similar to this:

More information about NICE DCV. For a managed approach to DCV session management NICE DCV Session Manager is the right solution including the NICE DCV Connection Gateway Proxy integration in case of interest.
Connect to a specific DCV session
When running multiple DCV sessions on one server you can specify in the DCV client to which session you would like to connect to by adding “#session_name” – e.g. #session3 in the example below:
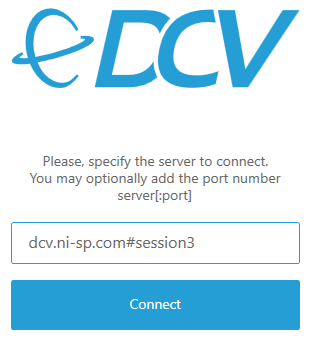
This also is possible in the DCV web client by specifying the session name in the URL like e.g. https://dcv.ni-sp.com#session3.
Allow different users to connect into DCV
Windows
DCV on Windows by default starts one session, this session has an “owner”.
The default owner proposed at installation time is Administrator. You can change it during installation time or afterwards in the registry.
By default only the owner can connect to that session. If you want multiple users to be able to connect to the session, you have to change the DCV session permissions. From the DCV admin guide:
“The default permissions file is used for all sessions if you do not specify a custom permissions file when creating a session. The default permissions file grants only the session owner full access to all features.“
“You can customize the default permissions file to include custom authorizations. The default permissions file is located at C:\Program Files\NICE\DCV\Server\conf\default.perm on Windows NICE DCV servers.”
You can configure a group (e.g. osgroup:YOUR_GROUP) or allow all users (%any%) to connect in default.perm:
[groups]
mygroup1=dom\user1, user2

[aliases]
; create permission alias
file-management=file-upload, file-download, clipboard-management

[permissions]
; Example to allow all users to connect
%any% allow builtin

; Example to allow users from osgroup YOUR_GROUP to connect
osgroup:YOUR_GROUP allow builtin

; allow the predefined mygroup to connect
group:mygroup1 allow builtin
The following features can be configured in the permissions file which allows for fine-granular permission control e.g. related to file transfer, cut&paste, USB devices, … :
builtin — All features.
display — Receive visual data from the NICE DCV server.
clipboard-copy — Copy data from the NICE DCV server to the client clipboard.
clipboard-paste — Paste data from the client clipboard to the NICE DCV server.
file-download — Download files from the session storage.
file-upload — Upload files to the session storage.
mouse — Input from the client pointer to the NICE DCV server.
keyboard — Input from the client keyboard to the NICE DCV server.
keyboard-sas — Use the secure attention sequence (CTRL+Alt+Del). Requires the keyboard
feature. Supported on version DCV 2017.3 and later.
touch — Use native touch events. Supported on version DCV 2017.3 and later. Not supported on Linux NICE DCV servers.
stylus — Input from specialized USB devices, such as 3D pointing devices or graphic tablets.
usb — Read the smart card from the client.
pointer — View NICE DCV server mouse position events and pointer shapes. Supported on version DCV 2017.3 and later.
audio-out — Play back NICE DCV server audio on the client.
audio-in — Insert audio from the client to the NICE DCV server.
printer — Print PDFs or XPS files from the NICE DCV server to the client.
smartcard — Read the smart card from the client.
Dynamically set NICE DCV session permissions at logon
Windows
Andrew from the DCV team has created a great guide how to set NICE DCV permissions at Windows login which applies to on-prem use cases similar to AWS based use cases of NICE DCV.
Create and test a dummy session
Linux
Sometimes it can be useful to test a session containing only a Window manager and a specific application or a terminal.
This allows the user to check in case there are session creation issues related to the specific session environment in use (typically gnome or KDE).In order to create a test dummy session, you need to create an init script init.sh for the user, containing something as:
#!/bin/sh
metacity &
xterm
This will start the metacity window manager and launch an xterm, as soon as the xterm process is terminated the session will also terminate.
Then you need to make sure that the init script is executable:
chmod a+x init.shTo create the session with the specified init script from the user shell, run this command:
dcv create-session dummy --init init.shTo create a session for another user as superuser you can run this command instead:
sudo dcv create-session test --user USER --owner USER --init init.shFinally, you can launch a test application such as dcvgltest or glxgears to verify that the OpenGL is correctly working.
Then you can check the session created with the command:
dcv list-sessionsConsole session without Physical Monitor
Linux
For virtual sessions there is no way to login with a different user than the one for which the session was created.
To make the console session work, we could try the following setup to disable the physical monitor attached to the server in the xorg.conf file.
Add this option to the “Device” section corresponding to the GPU card in use in the /etc/X11/xorg.conf configuration file:
Option "UseDisplayDevice" "none"then restart the X server with:
sudo init 3
sudo init 5
or the equivalent commands for systemctl:
sudo systemctl isolate multi-user.target
sudo systemctl isolate graphical.target
Then create a console session with the command:
sudo dcv create-session console --owner USERTo authenticate, you will need to pass credentials for the system user USER.
Idle timeout period
Overview
You can configure NICE DCV to disconnect idle clients.
There are certain actions that will reset the idle disconnect timeout period. They are list below.
- Moving the mouse
- Pressing the mouse buttons or moving the mouse wheel
- Pressing any key on the keyboard
- Touching the touchscreen (if enabled)
- Using the stylus (if enabled)
- Using the gamepad (if enabled)
- Streaming with the webcam (if enabled)
- Any file storage operation such as uploading files, creating directories, downloading files, or listing items
Linux server
- Edit the file
/etc/dcv/dcv.conf - Look for the code below and change the value to zero if you do not want disconnect, or any value greater than zero in minutes.
[connectivity]
idle-timeout=timeout_in_minutes - You can also set warnings about timeout X seconds before it happens editing this config:
[connectivity]idle-timeout-warning=seconds_before_idle_timeout - Then you need to restart the DCV session.
Windows server
- Open the Windows Registry Editor
- Open the
HKEY_USERS/S-1-5-18/Software/GSettings/com/nicesoftware/dcv/connectivity/key and select theidle-timeoutparameter. If the parameter does not exist, you can createNew, DWORD (32-bit) valuewithidle-timeoutname.
Note: the value must be in minutes - You can also set warnings about timeout X seconds before it happens editing the
HKEY_USERS/S-1-5-18/Software/GSettings/com/nicesoftware/dcv/connectivity/key and select theidle-timeout-warningparameter. If the parameter does not exist, you can createNew, DWORD (32-bit) valuewithidle-timeout-warningname.
Note: the value must be in seconds
Web client
The timeout of the sessions created through a web browser is controlled by the file:
${NICE_ROOT}/WEBAPP/WEB-INF/web.xmlSearch and modify the following portion (timeout is given in minutes):
<session-config>
    <session-timeout>30</session-timeout> <!-- time in minutes -->
  </session-config>
Set the display layout for a running Session
With the below command you can set the display layout for a running session:
dcv set-display-layout --session session-id display-layout-descriptorIf you specify more than one screen, separate the screen descriptors by a comma. For example, suppose these two screens:
- Screen 1: 1920×1080 resolution offset to x=0, y=0
- Screen 2: 800×600 resolution offset to x=1920, y=0 so that it appears to the right of screen 1.
The parameter will be:
1920x1080+0+0,800x600+1920+0It means:

Another example:
- Screen 1: 1920×1080 resolution offset to x=0, y=0
- Screen 2: 1920×1080 resolution offset to x=1920, y=0 so that it appears to the right of screen 1.
- Screen 3: 1024×768 resolution offset to x=-1024, y=0 so that it appears to the left of screen 1.
1920x1080+0+0,1920x1080+1920+0,1024x768-1024+0
Those examples were inspired in NICE DCV official doc.
NICE DCV Gateway integrated with DCV SM
Overview
Note: This tutorial is for advanced users that want to manually configure DCV Gateway with DCV Session Manager. We have an easier way to do this using web dashboards with EnginFrame Portal. Please check here our best integration solution.
With NICE DCV Gateway you can create and endpoint outside of your DCV Server infrastructure and redirect the traffic to the right DCV Server, if there is more than one. To have the DCV Gateway working, we need to follow 4 basic steps:
- Configuring the DCV SM Broker to be DCV Gateway resolver
- Configuring the DCV Gateway to look to the broker as resolver
- Register all DCV Servers under DCV SM Broker
- Set the DCV Session Manager Broker as DCV Authentication server
Important notes:
- The Session Manager will assign a DCV Server for a new session.
- The session needs to be mapped by the DCV SM Broker to the right DCV Server.
- The DCV SM Broker will authenticate the user.
Warning: Please pay attention and make good, clear and accurate notes about the ports that you will use for every service. Make clear which port will be used to:
- DCV Gateway listen DCV Viewer connections (DCV Gateway configuration file in [gateway] section).
- DCV Broker port to receive DCV Gateway requests (configured in DCV Gateway and Broker).
- DCV Agent port to connect into the Broker (configured in DCV Broker and DCV Agent)
- DCV Server port to receive DCV Viewer connections
Those ports needs to match in every configuration file or DCV SM will not be integrated with DCV Gateway.
Configuring the DCV SM Broker
First we need to configure the DCV SM Broker to be the Resolver of DCV Gateway. The DCV SM Broekr will authenticate the users. This means that DCV Gateway will use the resolver to find the DCV Server sessions.
Please edit the file /etc/dcv-session-manager-broker/session-manager-broker.properties and uncomment and configure these lines:
enable-gateway = true
gateway-to-broker-connector-bind-host = 0.0.0.0
gateway-to-broker-connector-https-port = 8449
Important:
- Make sure that 8449 port is not being used.
- Make sure that DCV Agent
broker_hostvariable can resolve the DNS, if DNS was used - Make sure that DCV Agent
broker_portis the same one configured inagent-to-broker-connector-https-port
You can restart the DCV SM Broker service:
sudo systemctl restart dcv-session-manager-brokerConfiguring the DCV Gateway
Then we need to configure the DCV Gateway to use DCV SM Broker as Resolver.
Please edit the file /etc/dcv-connection-gateway/dcv-connection-gateway.conf and configure the [resolver] entry:
[gateway]
web-listen-endpoints = ["0.0.0.0:8447"]
quic-listen-endpoints = ["0.0.0.0:8447"]
cert-file = "/etc/dcv-connection-gateway/dcv_gateway_cert.pem"
cert-key-file = "/etc/dcv-connection-gateway/dcv_gateway_key.pem"

[resolver]
url = "https://dcvsmbroker:8449"

[web-resources]
url = "https://localhost:9001"
Important:
- Make sure that
[resolver]port is the same one configured ingateway-to-broker-connector-https-port
The 8449 port means that DCV Gateway will look for dcvsmbroker dns name and try to connect into the port 8449. And the ports 8447 means that the DCV Gateway will listen the TCP and UDP protocols and forward the traffic to the right DCV Server.
You also need to change the DCV Gateway certificates. You need to copy from the Broker server the files /var/lib/dcvsmbroker/security/dcvsmbroker_ca.pem and /var/lib/dcvsmbroker/security/dcvsmbroker_ca.key to /etc/dcv-connection-gateway/dcv_gateway_cert.pem and /etc/dcv-connection-gateway/dcv_gateway_key.pem (or the right place if you did different configuration in the dcv-connection-gateway.conf file).
Register the DCV Servers under DCV SM Broker
We need to register all DCV SM Agents under the Broker service. For that we will use the command dcv-session-manager-broker.
If you never did it, you will see an empty DNS mapping list:
~# dcv-session-manager-broker describe-server-dns-mappings
Using system default Java runtime

 Available server - DNS names mappings:
 [ ]
Now we need to create a JSON file that contains the DNS mapping. Let’s create it under /tmp/dns_broker_mapping.json with the content below:
[
        {
                "ServerIdType": "Ip",
                "ServerId": "127.0.0.1",
                "DnsNames":
                {
                        "InternalDnsName": "dcvserver"
                }
        }
]- The ServerIdType will be Id: The Session Manager Agent creates a new UUID every time the hostname or the ip address changes.
- The ServerId is an unique identifier for DCV Servers.
- The InternalDnsName is the DNS name that will be used by DCV Gateway to connect into DCV Server
Then you need to make to change the user owner to dcvsmbroker:
chown dcvsmbroker:dcvsmbroker /tmp/dns_broker_mapping.json
Now we can import the DNS mapping to the Broker service with the command dcv-session-manager-broker register-server-dns-mappings –file-path=/tmp/dns_broker_mapping.json, as the example below.
root@dcv-install-gw:~# dcv-session-manager-broker register-server-dns-mappings --file-path=/tmp/dns_broker_mapping.json
Using system default Java runtime

 Successfully loaded 1 server id - dns name mappings from file /tmp/dns_broker_mapping.json
Note: To make it persistent, please read this guide.
Now you can check the registered Agents with this command:
~# dcv-session-manager-broker describe-server-dns-mappings
Using system default Java runtime

 Available server - DNS names mappings:
 [ {
   "ServerIdType" : "Ip",
   "ServerId" : "127.0.0.1",
   "DnsNames" : {
     "InternalDnsName" : "dcvserver"
   }
 } ]
Note: If you have multiple DCV Servers, you need to have a JSON mapping file like this:
[
    {
        "ServerIdType": "Ip",
        "ServerId": "120.140.150.160",
        "DnsNames": {
            "InternalDnsName": "dcvserver"
        }
    },
    {
        "ServerIdType": "Ip",
        "ServerId": "120.140.150.170",
        "DnsNames": {
            "InternalDnsName": "dcvserver2"
        }
    },
    {
        "ServerIdType": "Ip",
        "ServerId": "120.140.150.180",
        "DnsNames": {
            "InternalDnsName": "dcvserver3"
        }
    }
]
Notes:
- ServerId must be the DCV Server IP
- InternalDnsName must be the DNS name
Set the DCV Session Manager Broker as DCV Authentication server
Linux
Edit the file /etc/dcv/dcv.conf and set:
administrators=["dcvsmagent"]
ca-file="/etc/dcv-session-manager-agent/dcvsmbroker_ca.pem"
auth-token-verifier="https://brokerhost:8449/agent/validate-authentication-token"
no-tls-strict=true- The dcvsmbroker_ca.pem needs to be copied from the Broker (
/var/lib/dcvsmbroker/security/dcvsmbroker_ca.pem) to /etc/dcv-session-manager-agent/ - Replace broker_host with the Broker IP or DNS and make sure the port 8449 is the Broker port
Windows
You can execute these 3 lines in PowerShell or manually navigate in the Windows registry and create or modify every key.
- The dcvsmbroker_ca.pem needs to be copied from the Broker (
/var/lib/dcvsmbroker/security/dcvsmbroker_ca.pem) to C:\Program Files\NICE\DCVSessionManagerAgent\conf\dcvsmbroker_ca.pem - Replace broker_host with the Broker IP or DNS and make sure the port 8449 is the broker port
New-ItemProperty -Path "Microsoft.PowerShell.Core\Registry::HKEY_USERS\S-1-5-18\Software\GSettings\com\nicesoftware\dcv\security"  -Name ca-file -PropertyType STRING -Value "C:\Program Files\NICE\DCVSessionManagerAgent\conf\dcvsmbroker_ca.pem" -Force

New-ItemProperty -Path "Microsoft.PowerShell.Core\Registry::HKEY_USERS\S-1-5-18\Software\GSettings\com\nicesoftware\dcv\security"  -Name auth-token-verifier -PropertyType STRING -Value "https://broker_host:8449/agent/validate-authentication-token" -Force

New-ItemProperty -Path "Microsoft.PowerShell.Core\Registry::HKEY_USERS\S-1-5-18\Software\GSettings\com\nicesoftware\dcv\security"  -Name no-tls-strict -PropertyType DWORD -Value 1 -Force
NICE DCV Gateway: Connecting DCV Viewer
Important: This guide was created to help advanced users to understand how they can create very specific solutions using DCV Gateway and DCV Session Manager. The most easy way is use EnginFrame solution, a web gui dashboard. Click here for more details.
If you want to connect into a running session using DCV Viewer through the DCV Gateway, you will need:
- The session (id)
- The session token
- The DCV Gateway IP/DNS
- The DCV Gateway port
The DCV Gateway IP/DNS and the port you have it in the DCV Gateway configuration file. The session id you can get from DCV Server using DCV Session Manager CLI with the command below.
./dcvsm describe-sessionsAnd then you need to get the token with DCV Session Manager CLI:
/dcvsm get-session-connection-data --user root --session-id 6f7y8ubtv4657byn876f57Replace the user “root” with the owner of the session and “6f7y8ubtv4657byn876f57” with the ID of the session. The token will be in the end of the JSON and expire in 10 minutes (by default).
If you did not have any session created, you can create a new one:
./dcvsm create-session --user USER --name NAME --type consoleFinally, the complete URL that you need to use to connect through the DCV Gateway using DCV Viewer is:
https://GW_IP_OR_DNS:GW_PORT?authToken=TOKEN@SESSION_ID
You can also create the .dcv connection file, so you can just open the .dcv file (example: myuser.dcv) and it will load the DCV Viewer. The file need to have this content:
[version]
format=1.0

[connect]
host=1.2.3.4
port=8443
sessionid=6f7y8ubtv4657byn876f57
user=dcvdemo
password=
authtoken=SAVNxVg__4vYeI84.32f9Y-1-2Z-.4Xw0tQzHs2_2h4eVc0B7dwb.cMUG1c8x8P6IxiIqCy27myPBvpiR.Q5fj-1TO24Tc7WktlMPa_8kt.z3-P.7_E9u7o8257TTn8I85P6Z5BqK_MjZ82_i84XXt47TmlM468QS70-Kj9.BbEFe60ahKYz1_2fK-i-7LRFycqqy11pUG28sVGyKA08FmUY.f3kd7TA1w-kY5YI5lUJ28Lksvyn_KXAwmthgOHc
proxytype=NONE
proxyhost=
proxyport=
weburlpath=/

[options]
fullscreen=false
useallmonitors=false
Please replace the host, port, sessionid and authtoken with the right content. Save the file and double click to automatically open DCV Viewer.
DCV Session Manager CLI
Before use the DCV SM CLI, you need to get the Agent API credentials that will be used to DCV SM CLI talk with the DCV Agent. To get the credentials, please execute in the Broker server:
~# dcv-session-manager-broker register-api-client --client-name EF
Using system default Java runtime

 client-id: 1fc15078-66b2-415d-8fb8-ae51af034b70
 client-password: MGVmYzcyNzQtOWYzYy00NDZkLThmMjctYTczMGE1NGEyYmM2
Then open your DCV SM CLI config file conf/dcvsmcli.conf and set all the config like this:
[output]
# The formatting style for command output.
output-format = json

# Turn on debug logging
# debug = true

[security]
# Disable SSL certificates verification.
no-verify-ssl = true

# CA certificate bundle to use when verifying SSL certificates.
# ca-bundle = ca-bundle.pem

[authentication]
# hostname of the authentication server used to request the token
auth-server-url = https://brokerip:brokerport/oauth2/token?grant_type=client_credentials

# The client ID
client-id = 1fc15078-66b2-415d-8fb8-ae51af034b70

# The client password
client-password = MGVmYzcyNzQtOWYzYy00NDZkLThmMjctYTczMGE1NGEyYmM2

[broker]
# hostname or IP of the broker. This parameter is mandatory.
url = https://brokerip:brokerport
The brokerip is the DCV SM Broker server IP (in our example will be 127.0.0.1). The brokerport is what you configured in the variable client-to-broker-connector-https-port in the file /etc/dcv-session-manager-broker/session-manager-broker.properties (in our example will be 8448).
To test, let’s execute this command to describe the sessions:
~# ./dcvsm describe-sessions
WARNING : Validation of SSL certificates is disabled
{
    "request_id": "46e1c957-ea5e-4bf6-a959-9bbf107a6e36",
    "sessions": [
        {
            "id": "console",
            "owner": "ubuntu",
            "server": {
                "id": "ZGN2LWluc3RhbGwtZ3ctMTg4LjI0NS44MS45MC04YTc0MDQwZjAwZDk0MmM3YjU4ZTgxZjhkNDVmZTk3Yg==",
                "ip": "1.2.3.4",
                "hostname": "dcvserver",
                "default_dns_name": "static.1.2.3.4.clients.your-server.com.",
                "port": "8443",
                "endpoints": [
                    {
                        "ip_address": "0.0.0.0",
                        "port": 8443,
                        "web_url_path": "/",
                        "protocol": "HTTP"
                    },
                    {
                        "ip_address": "::",
                        "port": 8443,
                        "web_url_path": "/",
                        "protocol": "HTTP"
                    }
                ],
                "web_url_path": "/",
                "version": "2023.1.17701",
                "session_manager_agent_version": "2023.1.0",
                "availability": "UNAVAILABLE",
                "unavailability_reason": "SERVER_FULL",
                "console_session_count": 1,
                "virtual_session_count": 0,
                "tags": [
                    {
                        "key": "dcv:max-virtual-sessions",
                        "value": "-1"
                    },
                    {
                        "key": "dcv:max-concurrent-sessions-per-user",
                        "value": "1"
                    },
                    {
                        "key": "dcv:os-family",
                        "value": "linux"
                    }
                ]
            },
            "type": "CONSOLE",
            "state": "READY",
            "creation_time": "2024-09-03T09:04:51.148000+00:00",
            "num_of_connections": 0,
            "storage_root": ""
        }
    ]
}
You can see all other command executing:
root@dcv-install-gw:~/nice-dcv-session-manager-cli-1.1.0-140# ./dcvsm --help
Usage: dcvsm [OPTIONS] COMMAND [ARGS]...

  NICE DCV Session Manager CLI

Options:
  --conf TEXT           Name of the configuration file to read the
                        configuration parameters
  --broker-url TEXT     The URL of the broker
  --debug               Specify to enable the debug mode. By default is
                        disabled
  --no-verify-ssl       Specify to disable the verification of SSL
                        certification. By default is enabled
  --output-format TEXT  Specify the format of the output
  --ca-bundle TEXT      Specifies the path to a custom certificate bundle (a
                        file with a .pem extension) of CA to use when
                        establishing SSL/TLS connections
  --auth-server TEXT    URL of the authentication server used to request the
                        token
  --version             Show the version and exit.
  -h, --help            Show this message and exit.

Commands:
  close-servers                Closes one or more NICE DCV servers.
  create-session               Creates a new NICE DCV session.
  delete-session               Deletes the specified NICE DCV session.
  describe-servers             Describes one or more NICE DCV servers.
  describe-sessions            Describes one or more NICE DCV sessions.
  get-session-connection-data  Gets connection data for a specific NICE DCV
                               session.
  get-session-screenshots      Gets screenshots of one or more NICE DCV
                               sessions.
  open-servers                 Opens one or more NICE DCV servers.
  update-session-permissions   Updates the user permissions for a specific
                               NICE DCV session.
DCV Broker DNS mapping persistence
Overview
According AWS, you can use DynamoDB or Mysql or manually import the DNS mapping to register the DCV Server into the Broker. To make it persistent, you need to use DynamoDB or Mysql. Here we will provide a simple systemd idea that is capable to import the DNS mapping json file automatically during DCV Broker service start without have to setup any additional package.
Persistence using systemd
This procedure is very easy and you just have to copy and paste commands!
First, create the file /etc/dcvsm_broker_dns_mapping.json with the DNS mapping content that you create. You must guarantee that is a valid JSON, or it will fail.
Then you can create a temporary file called broker.sh with the below content:
#!/bin/bash

sudo mkdir -p /etc/systemd/system/dcv-session-manager-broker.service.d/

cat << EOF | sudo tee /etc/systemd/system/dcv-session-manager-broker.service.d/override.conf > /dev/null 2>&1
[Service]
ExecStartPost=/usr/bin/dcv-session-manager-broker register-server-dns-mappings --file-path=/etc/dcvsm_broker_dns_mapping.json
EOF

sudo systemctl daemon-reload

if [ -f /etc/dcvsm_broker_dns_mapping.json ]
then
        sudo chown dcvsmbroker:dcvsmbroker /etc/dcvsm_broker_dns_mapping.json
else
        echo "File >>> /etc/dcvsm_broker_dns_mapping.json <<< not found. Please create the file and fix the permissions:"
        echo "sudo chown dcvsmbroker:dcvsmbroker /etc/dcvsm_broker_dns_mapping.json"
fi
Then execute the broker.sh with root permissions:
sudo bash broker.shNow you can remove broker.sh.
Basically this script will install a systemd drop-in file that will be executed everytime the dcv-session-manager-broker service start, which means that after a server reboot or service restart, this script will be executed and import your Broker DNS mapping config from the file /etc/dcvsm_broker_dns_mapping.json.
Important:
- If you update your DCV Broker service, you will not lose the systemd drop-in file or the
/etc/dcvsm_broker_dns_mapping.jsonfile (that is why we stored it inside of/etc/), so your are safe to remove, update or reinstall the service. - If you want to update the DNS mapping without restart the
dcv-session-manager-broker, you can always run the command:
dcv-session-manager-broker register-server-dns-mappings --file-path=/etc/dcvsm_broker_dns_mapping.jsonApplying clipboard limits to a session
Here are some possible configurations to apply size limits to session clipboard ([clipboard] section). More references click here.
max-payload-size
Specifies the maximum size (in bytes) of clipboard data that can be transferred between server and clients. Maximum supported value 20 MB. If this value is missing, the maximum limit is enforced.
max-payload-size-copy
Specifies the maximum size (in bytes) of clipboard data that can be transferred from server to clients. If this value is missing max-payload-size is considered, otherwise the minimum of the two values is applied.
max-payload-size-paste
Specifies the maximum size (in bytes) of clipboard data that can be transferred from clients to server. If this value is missing max-payload-size is considered, otherwise the minimum of the two values is applied.
Disable physical screen for Linux console sessions
In case virtual sessions cannot be employed for several reasons (e.g. conflict with DCV-GL and the Vulkan drivers), it is possible to use a console session on Linux, disabling the physical screen from the Xorg configuration.
This addresses the case when a workstation is used remotely and local screen visualization should be disabled for security and privacy concerns.
Solution 1, if you have NVIDIA card
Please follow the respective tutorial clicking here.
Solution 2, if are using non-NVIDIA card
You need to add in your Device section of the xorg.conf file the code below:
Option "UseDisplayDevice" "none"And then execute:
sudo systemctl isolate multi-user.target
sudo systemctl isolate graphical.target
And then recreate your DCV console session.
Could not create a session due “No protocol specified”
“No protocol specified” error typically indicates that the X11 display server connection is failing due to permissions or authentication issues. This occurs when the DCV agent is trying to connect to the X Window System but doesn’t have proper authorization.
The specific issue is usually related to X11 authentication, where the process doesn’t have permission to connect to the X display. This often happens when running graphical applications as a different user than the one who owns the X session, or when environment variables like DISPLAY and XAUTHORITY are not properly set.
The xcb_connection_has_error() messages further confirm that the X connection is failing, as XCB (X protocol C Binding) is reporting connection errors.
To fix the issue you need to identify why /usr/bin/dcvxgrantaccess script can not give the right permission through /usr/bin/xhost command. The dcvxgrantaccess must be called by your display manager during session creation, through XSetup file. To read more details click here. During the DCV Server setup it will automatically install the right Xsetup customization to do that for you, but
If you are using GDM, you need to check if the file /usr/share/gdm/greeter/autostart/dcv.desktop exist with this content:
[Desktop Entry]
Type=Application
Name=DCV_X_grantaccess
Exec=/usr/libexec/dcv/dcvgdm
X-GNOME-Autostart-Phase=Initialization
NoDisplay=true
If the file is not there or is empty, ideally you need to reinstall DCV Server, because this is a customization done by DCV Server installer.
Then you need to check if why /usr/libexec/dcv/dcvgdm is not granting the permissions:
#!/bin/bash
# BEGIN-DCV
# Added by nice-dcv on Wed Mar 12 15:59:29 UTC 2025, please do not touch.
if (! command -v dcvgladmin || ! dcvgladmin status) > /dev/null; then
    dcvxgrantaccess +dcv
else
    dcvxgrantaccess
fi
# END-DCV
You and add before the #BEGIN-DCV line this code:
exec 2>"/tmp/dcvgdm.log.$$";set -xThen try to create a session and check the respective /tmp/dcvgdm.log* files which is the error with dcvxgrantaccess. Typically the issue is with your X configuration and when you have the dcvxgrantaccess working, the error “No protocol specified” will disappear.
Default layout for DCV Sessions
There are two different parameters, one for console and other for virtual sessions. You need to set under [session-management] configuration section.
- console-session-default-layout
- virtual-session-default-layout
You need to set the respective parameter as the example below:
[
  {
    'w': <width>,
    'h': <height>,
    'x': <x-position>,
    'y': <y-position>
  },
  {
    'w': <width>,
    'h': <height>,
    'x': <x-position>,
    'y': <y-position>
  }
]
We expanded the code to make it clear, but you need to configure like this:
console-session-default-layout=[{'w': 800, 'h': 600, 'x': 0, 'y': 0}, {'w': 1024, 'h': 768, 'x': 800, 'y': 0}]or
virtual-session-default-layout=[{'w': 800, 'h': 600, 'x': 0, 'y': 0}, {'w': 1024, 'h': 768, 'x': 800, 'y': 0}]Notes:
- If you are using Windows, you need to use Windows registry keys syntax. Click here to get detailed info.
- In this example there are two screens and the position of the array is the screen number (0 and 1), with 800×600 screen0 resolution, then 1024×768 screen1 resolution.
- If you just want one screen, remove the screen1 part and also the comma (,).
- You can check some parameter illustrations from the set-display-command clicking here.
DCV SM Agent: “TOML Error: unexpected character found”
Overview
SessionManager agent loads a TOML-formatted credential file during agent startup. Since this file is generated separately for each machine, it could explain why the you can see a specific server having this issue, but not the others. The problem might be caused by a corrupted or malformed credentials file.
To fix the issue, basically you need to remove the current credential file an restart the service, so it will be generated again.
To remove the current credential file, you need to proceed the steps below.
Linux
Remove the credentials.toml file from one of these directories:
- $XDG_CACHE_HOME/dcv-session-manager-agent
- $HOME/.cache/dcv-session-manager-agent
If you do not find the file, you can do a find:
find / -type f -iname credentials.tomlNote: Just remove the DCV session manager related file.
Then you can restart the DCV Session Manager Agent.
Windows
Stop the service:
net stop DCVSessionManagerAgentServiceRemove the same file:
C:\Windows\system32\config\systemprofile\AppData\Local\DCVSessionManagerAgent\credentials.tomlAnd, finally, start the service:
net start DCVSessionManagerAgentServiceDCV SM: Increase the screenshot size
If you need to increase the screenshot quality when using DCV Session Manager, you need to configure session-screenshot-max-width and session-screenshot-max-height inside of Broker configuration file. To get more details, please check the official documentation clicking here.
Maximum number of clients reached
If you are seeing “Maximum number of clients reached” even with a single session and the session is hanging or freezing, please set the configuration below under dcv.conf file:
[session-management]
virtual-session-xdcv-args = "-maxclients 1024 "
Important: the space after the last double quotes is needed. Do not remove it!


